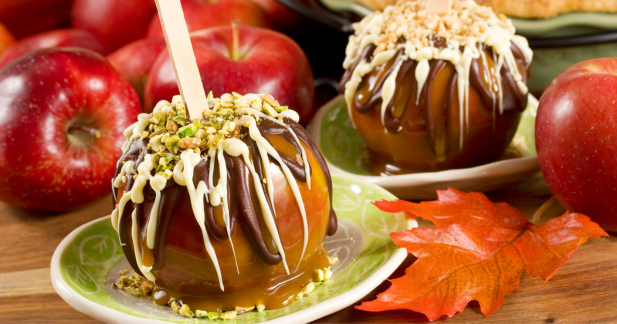
Chocolate-Covered Caramel Apples
September 10, 2024
Chocolate-covered caramel apples are a delightful combination of tart and sweet, crunchy and chewy. They’re perfect for autumn gatherings, Halloween parties, or even as a fun homemade gift. If you've never tried making them yourself, don’t worry—it’s easier than you think!
Let’s break it down step by step so you can enjoy these irresistible treats at home.
Chocolate-Covered Caramel Apples RecipeWhat you need:
What to do: 1. Before you get started, wash and dry the apples thoroughly. Apples are usually coated in a wax that can prevent the caramel from sticking, so it’s a good idea to give them a quick rinse with hot water or scrub them with a bit of vinegar. Once dry, insert the wooden sticks into the top of each apple, making sure they’re secure. 2. Place the unwrapped caramel candies in a microwave-safe bowl with a splash of water or cream (about 2 tablespoons). Microwave in 30-second intervals, stirring in between until smooth and fully melted. If you’re using homemade caramel, just heat it gently until it’s warm enough for dipping. 3. Now comes the fun part! Hold the apples by the stick and dip each one into the melted caramel, twirling it to coat the apple evenly. Let any excess caramel drip off before placing the apple on a parchment-lined baking sheet. If you want, you can sprinkle on some toppings while the caramel is still sticky. Let the apples sit for about 10-15 minutes to allow the caramel to set. 4. While your caramel-covered apples are setting, melt the chocolate. You can use the microwave again, heating in 30-second intervals and stirring until smooth, or use a double boiler to gently melt the chocolate without burning it. 5. Once the caramel is set, dip each apple into the melted chocolate. You can fully cover the apple or just dip the bottom half—whatever looks best to you! While the chocolate is still wet, add more toppings if desired. Crushed nuts, sprinkles, or a drizzle of white chocolate all make beautiful finishing touches. 6. Place the finished apples back on the parchment paper and let them set for about 30 minutes at room temperature, or pop them in the fridge for a quicker setting time. Once they’re firm, they’re ready to enjoy! |
Enjoying and Storing Chocolate-Covered Caramel Apples
Your chocolate-covered caramel apples can be stored in the fridge for up to a week, but they’re best enjoyed fresh. When it’s time to eat, slice the apples into wedges for easier munching—you don’t have to struggle through the thick coating with your teeth!
Get Creative with Flavors
One of the best things about making chocolate-covered caramel apples at home is that you can get creative!
Try using flavored caramels, such as salted caramel or vanilla caramel, or switch up the chocolate with different types like dark chocolate bars or white. Use good quality dark chocolate for the best flavor and health benefits. Look for chocolate with at least 70% cocoa content.
You can also experiment with toppings like crushed pretzels, coconut flakes, or even a sprinkle of cinnamon for a cozy fall flavor.
Chocolate-covered caramel apples are the perfect treat for any occasion, whether you're celebrating the fall season or just craving something sweet. They’re easy to make, customizable, and fun to eat. Plus, they’re a great project to do with kids or friends!
So, gather your ingredients, get dipping, and enjoy these delicious caramel-chocolate creations.
Have some extra melted chocolate? Try making these chocolate covered raisins!
Making your own chocolate treat? Don't forget to share it on social media and tag me on Facebook and Twitter so I can check them out!
What recipe do you want to learn next? Comment down below and let’s learn together!

You'll get 52 chocolate recipes you can make to impress your friends (and a bonus recipe that you put on your face instead of in your mouth). The Recipes Of CUO ebook represents some of the favorite recipes we have published over the years.
CLICK HERE to get a FREE copy!
- Easy Chocolate Easter Nests Recipe - April 15, 2025
- The Best Chocolate Gifts for Easter (That Everyone Will Love!) - April 8, 2025
- National Chocolate Mousse Day: How to Make the Perfect Chocolate Mousse - April 1, 2025


